
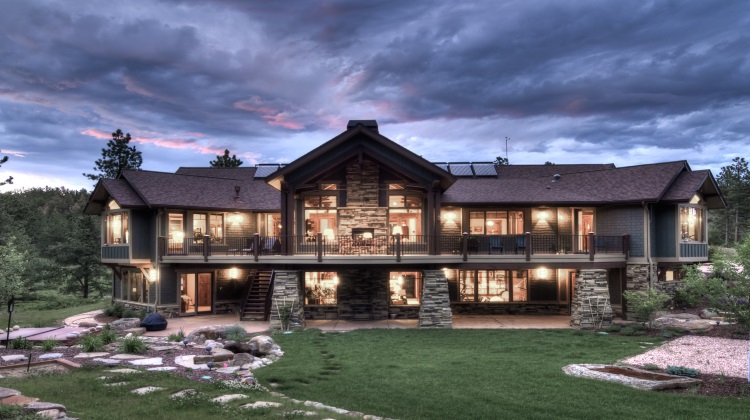
Garden Path Lighting Ideas for a More Inviting Backyard
There's something unmistakably Australian about wandering down a timber-edged garden path on a warm summer evening, drink in hand, with the cicadas humming in the background. Our backyards tend to be extensions of the home, and a thoughtfully lit walkway does more than stop you from tripping over the pavers; it shapes the mood of the entire outdoor space. Whether your home is a weatherboard in the suburbs of Perth or a coastal retreat near Byron Bay, the right path lighting can turn a forgotten side yard into a feature garden.
Lighting along a garden path serves a practical purpose too. After sunset, an unlit path becomes a slip hazard, particularly when moisture collects on bluestone or slate. A soft wash of light helps family members and visitors navigate safely, and it can also deter unwanted guests. When planned with care, the same fixtures accentuate the textures of your planting, casting shadows that make a humble agapanthus or kangaroo paw look like part of a curated gallery. The challenge is choosing a system that suits Australian conditions, complies with local standards, and still feels effortless in the landscape.
Before selecting the first fixture that catches your eye at the hardware shop, it helps to think about how you actually use your garden. Do you step outside most evenings to bring in the washing from the line? Are you hosting long Sunday lunches that drift into candle-lit dinners? The answers will guide how bright, how soft, and how automated your lighting needs to be. Over the next sections, we'll look at layout, fixture types, power sources, and smart controls, so you can design a path that works year-round in the Australian climate.
If you'd like broader inspiration on outdoor lighting and home upgrades before diving in, browse the home lighting range for ideas on fixtures that suit both classic and contemporary gardens.
Planning Your Path Lighting Layout
The first step is mapping your path in daylight. Grab a notebook, sketch the route from the back door to the shed, the vegie patch, or the pool fence, and note any existing trees, garden beds, or level changes. In suburban blocks from Adelaide to Brisbane, paths often weave between native plants, raised sleeper beds, and water tanks, so it pays to mark every obstacle. Once you have a base plan, decide where you want the eye to pause: a favourite maple, a piece of public art, or the gate leading to the chook run.
Spacing matters as much as placement. A common mistake is clustering fixtures too tightly near the entry, which leaves the far end of the path feeling dim and uneven. As a rough rule, position bollards or path lights roughly two to three metres apart, and use a tighter rhythm of around one metre for step lights where the path has level changes. Walk the route after dark with a torch and tape to mimic the throw of different beam angles. You'll quickly see where the light falls short and where it spills unnecessarily onto a neighbour's fence.
Finally, consider how the lighting interacts with adjacent zones. A path that runs alongside a deck or an alfresco dining area shouldn't compete with overhead pendants or festoon lights. Think of path lighting as the lower tier of a three-layer scheme: uplighting on feature trees at the top, mid-level wall or fence washers in the middle, and your path lights anchoring it all at ground level. This layered approach is what lighting designers across Sydney and Melbourne use to give backyards depth after dark.
Choosing the Right Fixtures for Australian Conditions
The Australian outdoors is tough on materials. Salt-laden coastal air from places like the Mornington Peninsula or the Illawarra will corrode cheap metal fittings within a season, and the harsh UV can turn brittle plastic shades yellow. Look for fixtures with marine-grade stainless steel, solid brass, or powder-coated aluminium bodies, all of which are commonly stocked at Bunnings and trade outlets. A reliable ingress rating is non-negotiable: aim for IP65 or higher so the fittings survive driving rain and the occasional blast from a garden hose.
Bushfire-prone areas add another layer of consideration. If your property falls within a designated Bushfire Attack Level zone, especially in the hills around Perth or the edges of the Dandenong Ranges, you'll need fixtures that comply with Australian Standard AS 3000 and any relevant BAL-rated installation rules. Heat-resistant cabling, sealed conduit, and fittings with minimal external plastic help reduce ignition risk. Your local sparkie will know the ratings for your specific block, and it's worth the call before you buy.
Don't forget the style of the fitting itself. Modern coastal homes often suit sleek black or graphite bollards, while a Federation-style cottage in the Adelaide Hills might pair better with aged brass lanterns or weathered copper. Whatever you choose, opt for replaceable LED modules rather than sealed units. LEDs from reputable brands can be swapped in a few minutes when they eventually fail, saving you from digging up the whole path five years down the track.
Solar-Powered Options for the Aussie Backyard
Solar path lights have come of age, and they're a popular pick for renters or anyone wanting to avoid trenching a new cable run. The latest models use small mono-crystalline panels, lithium batteries, and warm-white LEDs in the 2700K to 3000K range, which feels far more inviting than the cold blue tones of older kits. They're perfect for the deep courtyards common in newer townhouse developments in inner Melbourne and Brisbane, where running mains power would be a nightmare.
The catch is placement. In the southern states, shorter winter days and overcast afternoons can leave cheaper solar lights dim by 8 pm. Place them where they receive at least four hours of direct sun, ideally on the north side of the path, and avoid shaded spots under thick eucalypt canopies. A small investment in better panels and larger battery capacity pays off in reliable performance through June, when daylight fades early and you're most likely to want the lights on.
Solar is also a tidy answer for bush-friendly gardens. With no cabling to run, you can rearrange the layout as your planting matures or as you add new garden rooms. Many homeowners start with a starter kit from a chain retailer and gradually swap in upgraded bollards or spike lights over a couple of seasons. Look for models with dusk-to-dawn sensors and a manual override, so you can switch them off during a long outdoor dinner without covering each sensor with a finger.
Low-Voltage Wired Systems for Reliable Glow
For a longer-term solution, a 12V or 24V low-voltage system delivers consistent brightness regardless of the weather. Most off-the-shelf kits include a transformer, a length of two-core cable, and a handful of LED path lights, all of which can be installed without an electrician if you stick to plug-in transformers. If you're hardwiring into a 240V circuit, however, Australian regulations require the work to be done or certified by a licensed sparkie, particularly for any cabling crossing wet areas or underground runs.
Low-voltage systems scale beautifully. You can add more lights along the cable run as your garden grows, and many transformers support dimmers, timers, or smart relays. In larger suburban blocks around the Perth foothills or the leafy pockets of Canberra, this flexibility lets you evolve the design without redoing the entire trench. Choose a transformer rated at least 20% above your total load to keep components running cool and avoid nuisance tripping.
Cable runs are usually buried in a shallow trench at about 150mm to 200mm deep, marked with warning tape before you backfill. Where the path crosses under lawn, run the cable through a length of PVC conduit to protect it from garden forks and future edging jobs. Some installers prefer to lay cable beneath the path itself, sliding it under pavers before they're laid, which is much easier than trying to retrofit once the path is finished.
Lighting Around Native Plants and Wildlife
Australian gardens aren't the same as those overseas. Many backyards showcase kangaroo paw, grevillea, banksia, lomandra, and wattle, all of which attract nectar-feeding locals by day and moth catchers at night. Strong white or blue light can disorient flying visitors and disrupt nocturnal pollinators, so aim for warm tones under 3000K and direct beams downward rather than up into the canopy.
Spike-mounted lights positioned low and angled across a planting bed create beautiful texture without throwing stray light into the sky. This approach aligns with the Dark Sky principles increasingly adopted across regional Victoria and Tasmania, where councils encourage residents to reduce upward glare. Shielded fittings also keep the night sky visible for anyone who enjoys a quiet moment of stargazing from the back lawn.
If you share your garden with possums, bandicoots, or the occasional visiting echidna, avoid fixtures that produce sharp, hot spots where wildlife may shelter. Diffused bollards with downward-facing lenses keep the path bright for you while leaving nooks and logs dim and undisturbed. A few well-placed fixtures will reward you with regular sightings of native wildlife without altering their habits.
Layering Light with Spots, Bollards, and Step Lights
A well-lit path relies on more than a single fixture style. Bollards give the consistent, ambient glow that anchors the route, while ground-mounted spike spots are brilliant for highlighting a sculptural plant, a rock feature, or the silhouette of a clumping grass like lomandra. Step lights, recessed into risers or walls, quietly mark level changes without producing glare, which is important when you're carrying a basket of laundry back to the house.
Aim for balance rather than maximum brightness. A path lit to 20 to 50 lux is usually plenty for residential settings; anything brighter feels like a car yard. Use warm-white LEDs in the 2700K to 3000K range to flatter skin, timber, and foliage. Cooler tones can make a backyard feel clinical and tend to attract more insects, a familiar frustration during a Queensland summer.
When you're selecting beam angles, narrow beams around 15 to 25 degrees create dramatic accent points, and wider floods of 40 degrees or more wash broader areas softly. Combining the two along a winding path adds rhythm: a bright moment followed by a gentle curve of light, then another accent where the path bends. This is what separates a backyard that feels merely lit from one that feels designed.
Smart Controls and Timers
A simple timer or a smart relay turns your path lighting into a hands-off system that just works. Plug-in or hardwired timers, available from most hardware chains, can be set to switch on at dusk and off at a chosen hour, saving energy and extending bulb life. For households that entertain late or shift schedules seasonally, Wi-Fi or Zigbee relays let you adjust the schedule from a phone, even when you're away on a holiday up the coast.
Motion sensors add another layer of usefulness, especially along side paths that lead to the laundry, the bin storage, or the side gate. A gentle ramp-up rather than a sudden flash feels far more welcoming and won't startle the dog. Pair motion activation with an always-on low-level glow so the path never goes fully dark, which is safer for visitors and helps you avoid that pitch-black stumble when you come home late.
Whatever controls you choose, keep the transformer and any smart relays in a sheltered, ventilated spot, ideally off the ground and away from sprinklers. A small weatherproof housing near the side of the house, under the eaves, or inside the garage works perfectly. That single decision will save you from weather-related failures and keep the system humming through every season.
If you're ready to start planning your own path lighting project, grab a sketch of your garden, mark out your fixture locations, and begin gathering the gear you need. The right combination of bollards, spike lights, and step lights, paired with a reliable transformer and a simple timer, will transform your evening garden into one of the most inviting spaces at home. For more guidance on outdoor upgrades and lighting trends, explore the latest from the blog.